By Background Remover Video Editorial Team
How to Remove a White Background from a Logo Without Losing White Details
Remove the white box around a logo without deleting white artwork. Compare vector export, color removal, GIMP masks, and AI, then check edges and PNG transparency.
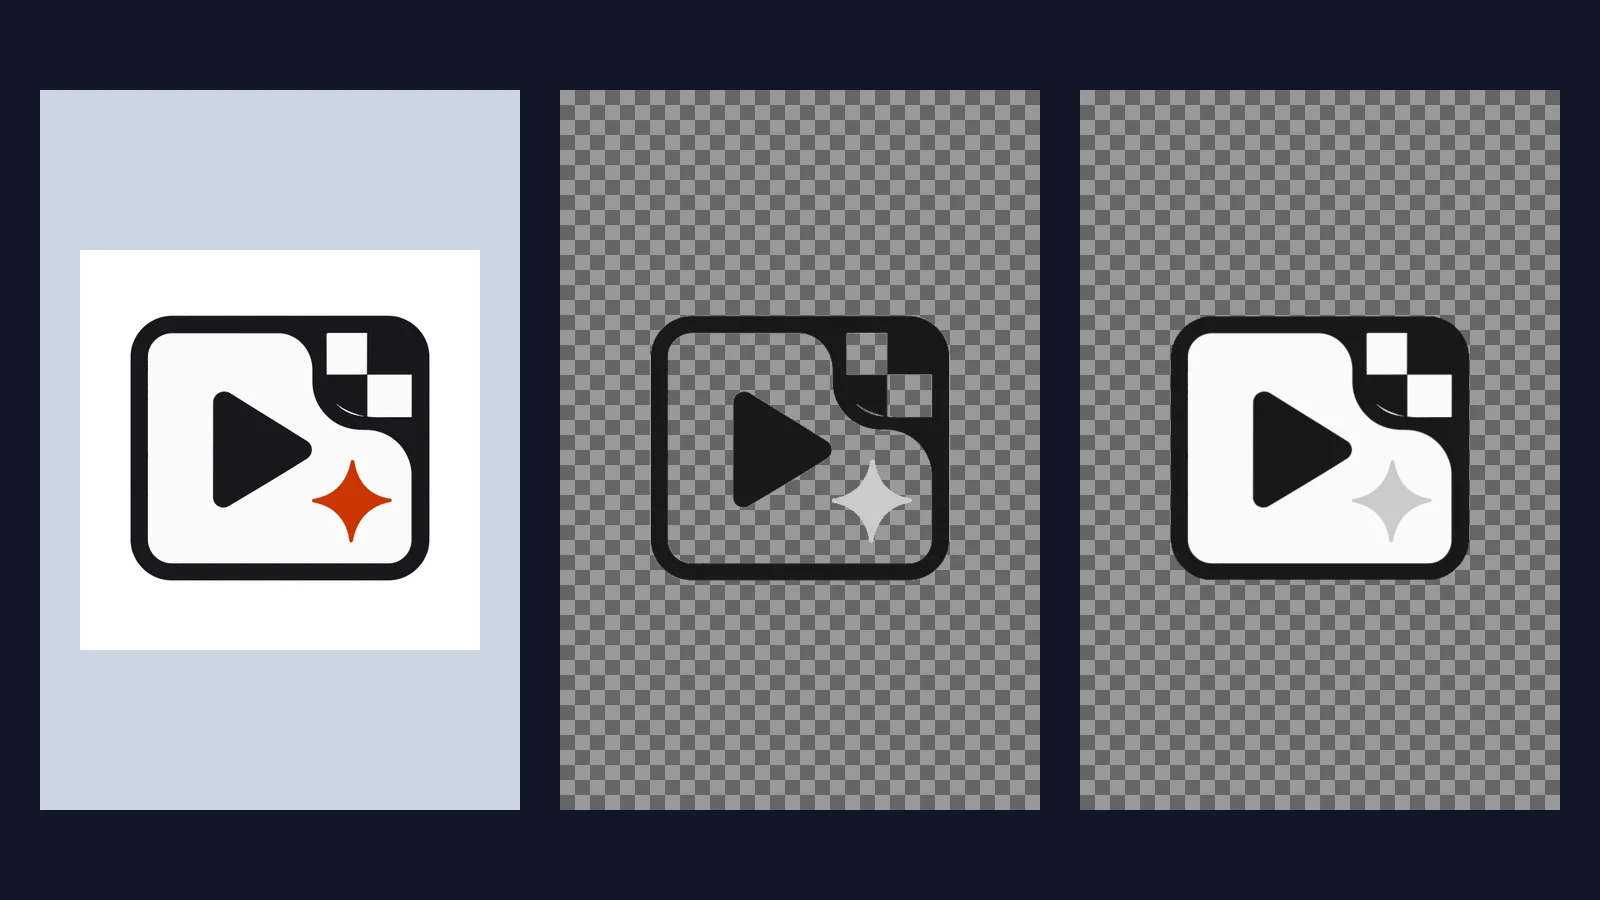
The safest way to remove a white background from a logo is to remove the background object in the editable source and export again. If you only have a raster image, use global color removal only when the logo contains no white artwork. When white belongs inside the logo, select only the connected outside background and turn that selection into a mask. Export as PNG and inspect the result on checkerboard, light, dark, and brand-color backgrounds.
Which method should you use?
| Your logo file or background | Best method | Main tradeoff |
|---|---|---|
| Editable SVG, Illustrator, Figma, or other source file | Remove the background layer and export again | Cleanest route, but it requires the original editable source. |
| Flat white background and no white artwork in the logo | Global color removal | Fast and local, but every matching color can become transparent. |
| Flat, connected white background with white details inside the logo | GIMP Fuzzy Select plus a layer mask | Preserves disconnected white artwork, but the edge and selection need inspection. |
| Uneven, photographic, shadowed, or textured background | AI background removal | Fewer manual selection steps, but it requires a server upload, sign-in, and one credit. |
| Small or heavily compressed JPEG | Recover a better source, then mask manually if necessary | JPEG blocks and pale fringes limit what any removal method can recover. |
Do not split these cases into separate “make a logo transparent” workflows. They are the same task with different input constraints. The decision is whether white means background, artwork, or both.
The same white-detail logo used in every test
The sample below is a 512×512 input built from this site's repository-owned logo. Its outside transparency was composited onto white, while the page area and checker motif contain disconnected near-white artwork that should stay visible. Both raster methods in this guide received this exact input.

This controlled sample is useful because a method cannot pass merely by making the outer box disappear. It also has to keep the white page, white checker squares, black hard edges, orange mark, dimensions, and usable alpha channel.
Method 1: Re-export from the editable source
Best for: an SVG, design document, or other source where the white rectangle is still a separate object.
- Open the editable source and find the background rectangle, artboard fill, or export setting that creates white behind the logo.
- Hide or remove that background without changing white shapes that belong to the mark.
- Export SVG when the destination accepts vectors, or PNG when it needs a raster image with transparency.
- Reopen the exported file over a dark color and confirm that the canvas is transparent rather than white.
SVG supports vector geometry and opacity, as described by the W3C SVG rendering model. That does not mean an already flattened PNG or JPEG can recover its original paths. If all you have is a raster copy, move to a selection or mask instead of tracing automatically and assuming the reconstructed edge is exact.
Failure signal: the exported logo still has a rectangular white box. Check whether an artboard background or export option is adding white. If the file is flattened and the white shape cannot be selected separately, use Method 2 or 3.
Method 2: Remove white globally when white is not artwork
Best for: a flat white background around a logo that contains no white or near-white design elements.
The Remove Color from Image tool is provided by this site and runs locally in the browser. Its current English workspace accepts JPEG, PNG, and static WebP files up to 25 MiB and downloads a full-size transparent PNG. It matches the selected color across the image; it does not understand which pixels are semantically “background.”
- Upload the raster logo and select white (
#FFFFFF). - Start with a narrow Color range. In the test shown here, the current defaults were Color range
12%, Edge softness8%, and Spill cleanup20%. - Switch the preview to Result and Checkerboard.
- Inspect white text, highlights, enclosed shapes, and antialiased edges before downloading the PNG.
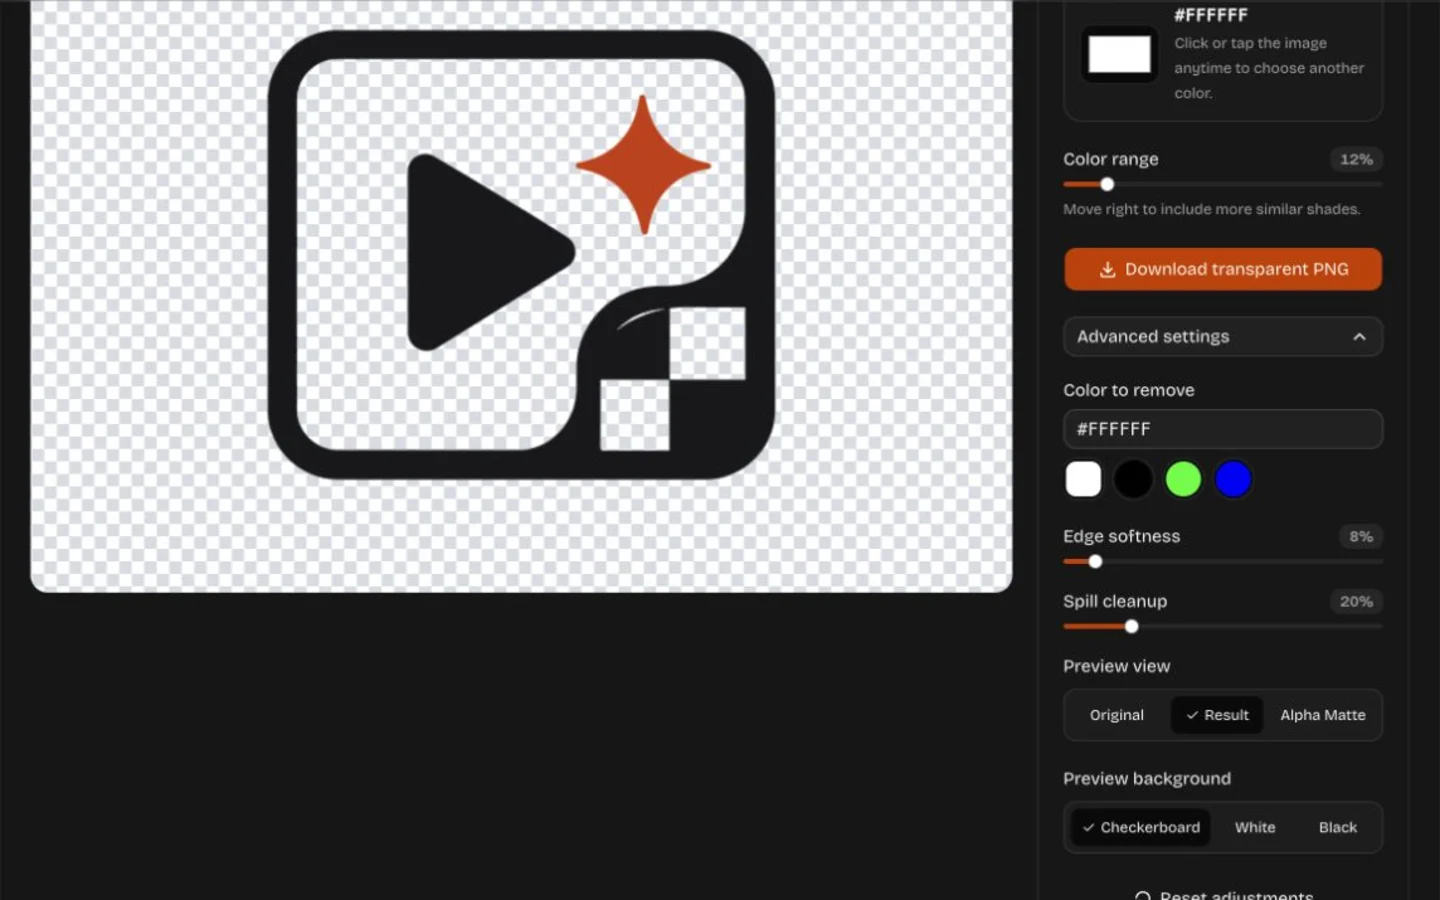
On the owned input, those defaults removed the intended outside white and also made all 72,945 exact #FAFAFA internal-artwork pixels transparent. The dimensions stayed 512×512, but the checkerboard showed through the page and white checker squares. That is the failure signal: the box is gone, yet the logo is damaged.
Lowering Color range can protect some near-white shades, but exact white artwork can still match exact white background. If a required detail disappears, undo the change and switch to the connected-mask method rather than trying to paint the detail back from memory.
Use the local Remove Color from Image workspace after confirming that white is not part of the logo.
Method 3: Keep white details with a connected GIMP selection and mask
Best for: a solid or nearly solid white exterior that touches the image border, while wanted white artwork is enclosed by darker pixels.
These steps were reproduced in GIMP 3.2.4 on the same owned input. The official Fuzzy Select manual explains that the tool grows from the clicked point through contiguous similar pixels. That connected behavior is the reason it can distinguish the outside white from disconnected white inside this logo.
- Open the image and choose
Layer → Transparency → Add Alpha Channel. - Choose
Tools → Selection Tools → Fuzzy Select, or pressU. - Click the outside white near a corner. For this sample, Antialiasing was on, Feather edges was off, Sample merged was off, and Threshold started at
10. - Inspect the marching boundary around the exterior and zoom in on every internal white shape. If the selection crosses the black frame or enters artwork, lower the threshold or undo and click a cleaner background point.
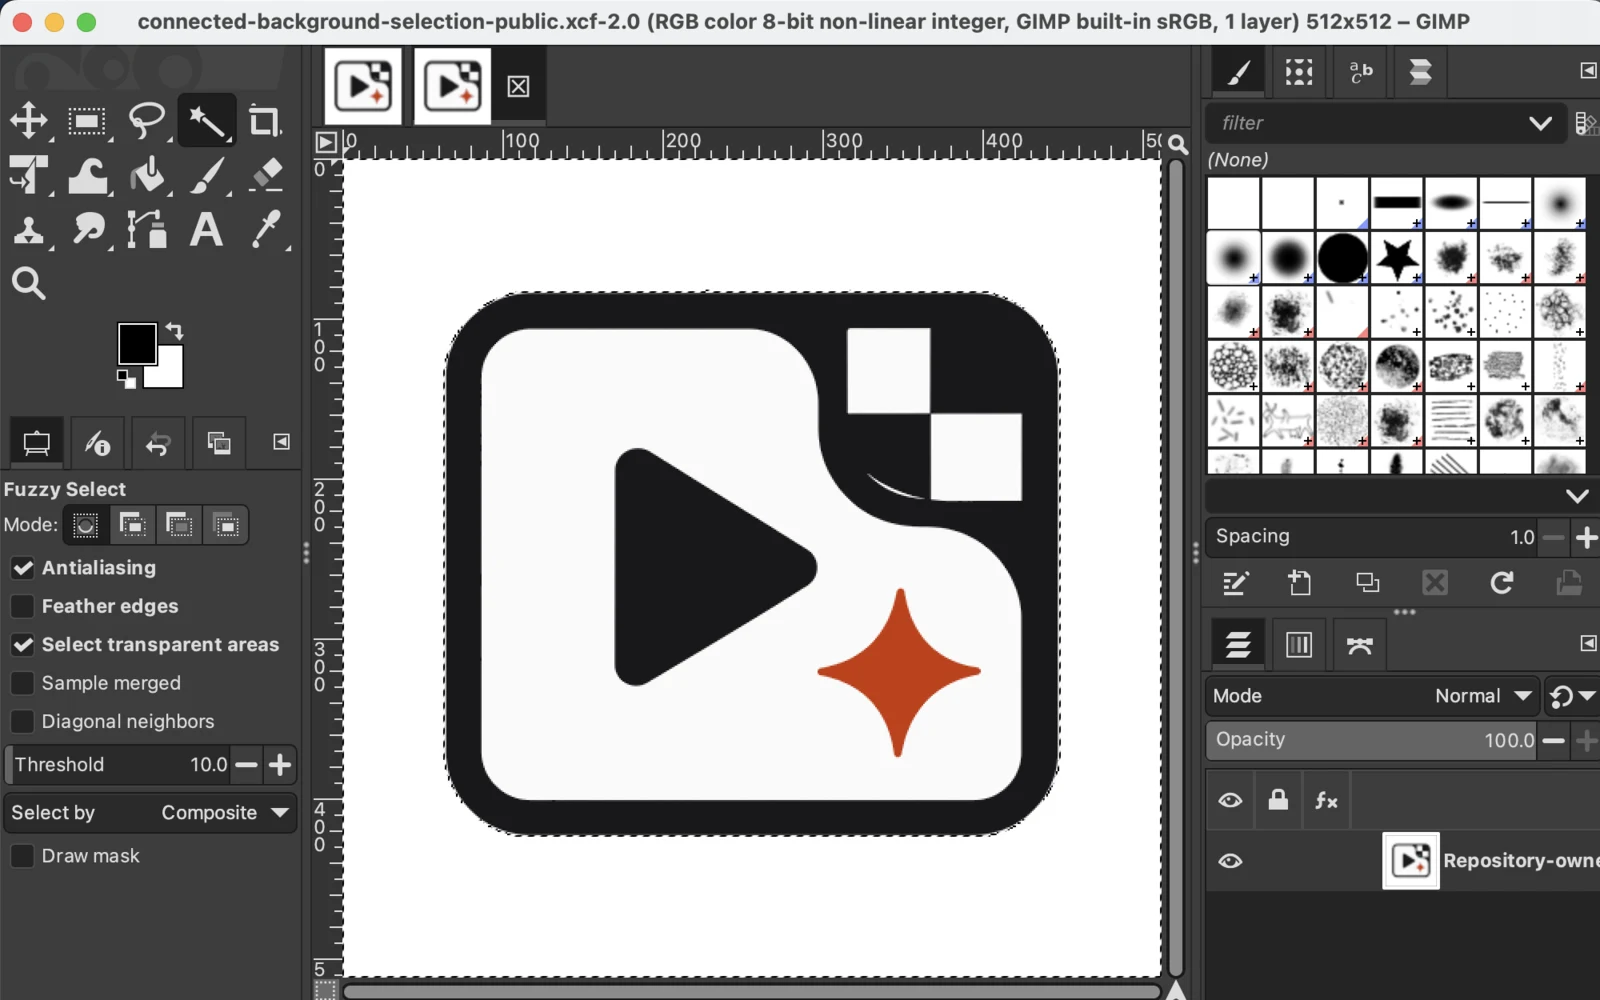
- If a pale fringe remains on a dark preview, adjust the edge before creating the mask. On this specific 512×512 sample, growing the exterior selection by
1 pxremoved the visible fringe. Do not copy that value blindly: a one-pixel grow can cut into a smaller or thinner logo. - Invert the selection so the logo, not the background, is selected.
- Choose
Layer → Mask → Add Layer Masks…, initialize the mask fromSelection, and add it. The GIMP layer-mask documentation describes selection-based initialization and the resulting opaque/transparent mask values. - Clear the selection, keep the source and mask editable, then export a PNG.
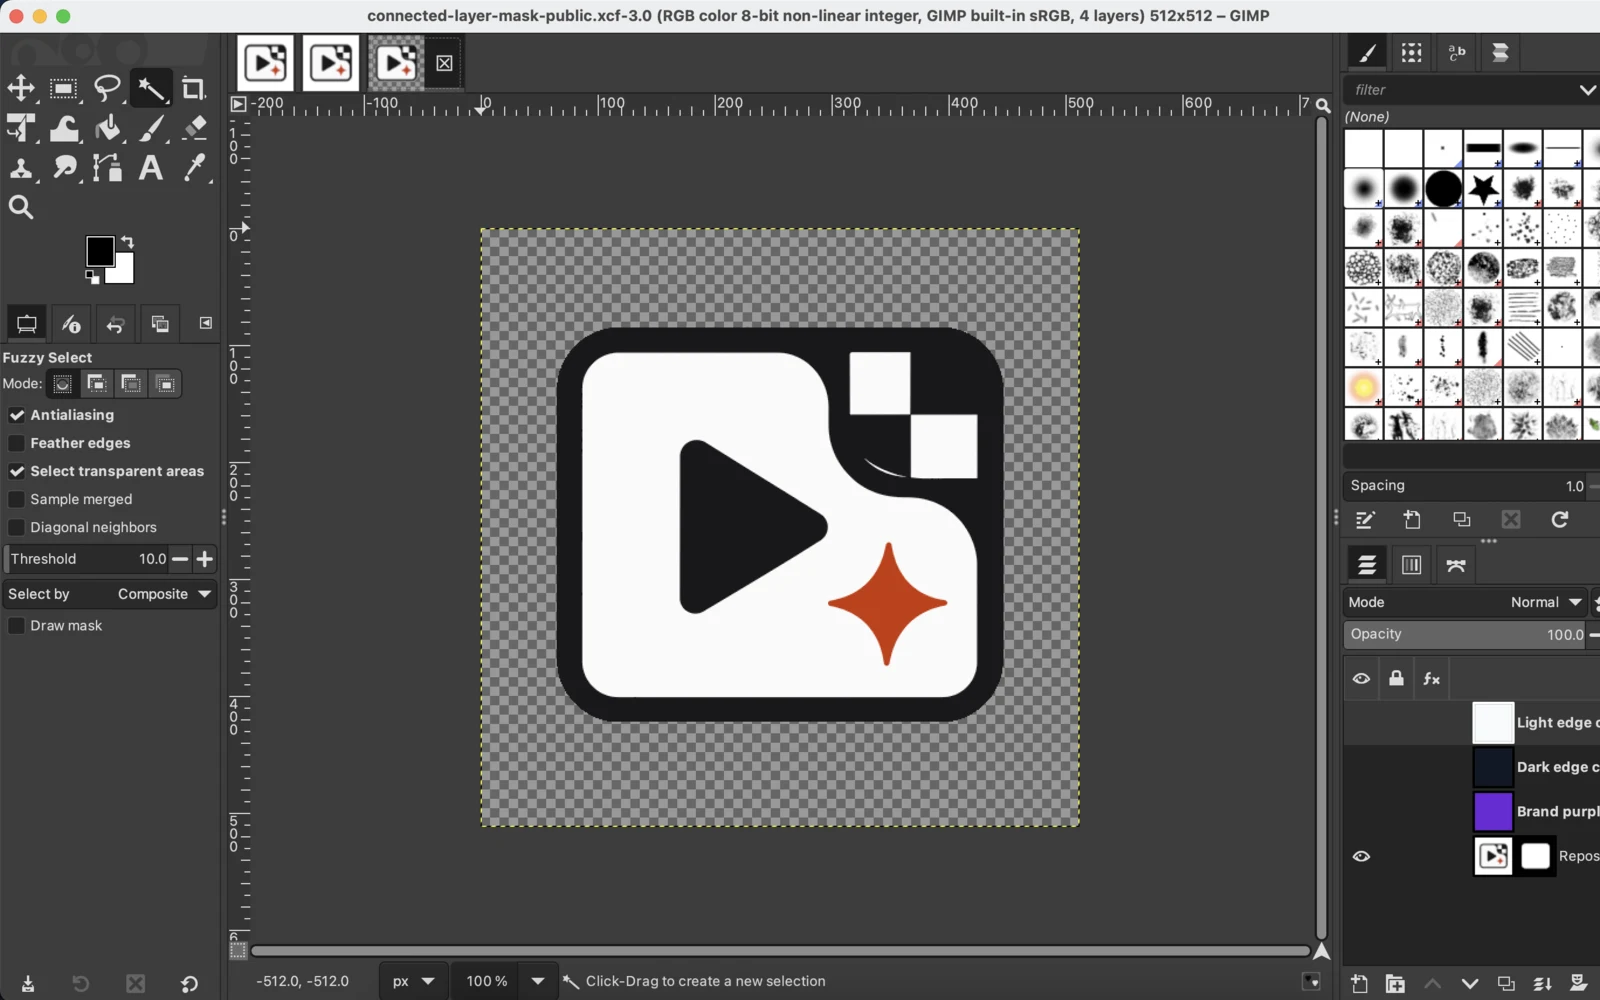
The final GIMP PNG stayed 512×512, made the border-connected exterior transparent, and kept all 72,945 exact #FAFAFA artwork pixels opaque. The editable mask also preserved disconnected exact-white artwork that the global method removed.

Failure signals and fixes:
- Internal white turns transparent: undo, reduce Threshold, and confirm that only the connected exterior is selected before inverting.
- A pale outline appears on dark or purple: refine the exterior selection or paint carefully on the mask; test a one-pixel grow only if the edge can tolerate it.
- The edge becomes clipped or angular: undo the grow, restore the mask, and refine at high zoom with a softer mask transition where appropriate.
- White pockets outside the logo remain: they may be disconnected from the clicked region. Add them deliberately to the selection without selecting white artwork.
For photos, hair, paths, Select by Color, Color to Alpha, and other GIMP cases, use the full GIMP background-removal guide. Those methods are broader than this connected white-logo task.
Method 4: Use AI for an uneven or photographic background
Best for: a background with shadows, texture, gradients, or photography where a single connected-color selection is not a good model.
The Image Background Remover is also provided by this site, but it is a different workflow from the local color tool. It requires sign-in and sends the image to our server for processing. The current public workspace accepts one JPEG, PNG, WebP, GIF, or AVIF up to 10 MiB, uses one credit per image, and returns one static transparent PNG. Files and results are retained for seven days; when processing fails, the credit is returned when applicable. It does not preserve GIF animation or replace the background. Current credit terms are listed on the pricing page.
- Confirm that a server upload, sign-in, and one-credit charge fit the file.
- Upload one supported image and start the background-removal task.
- Download the static PNG result.
- Inspect external edges, thin marks, holes, and intended white artwork on contrasting surfaces before using it.
AI can reduce the manual selection work on a complex background, but it is not guaranteed to retain every thin edge, internal opening, or white mark. Inspect the result exactly as you would inspect a manual mask. Choose this path only when the server upload and one-credit cost fit the task.
Failure signal: an internal opening closes, a thin stroke disappears, or a pale edge remains. Try a better source or repair the result with a manual mask; do not present an uninspected automatic result as final artwork.
Open the Image Background Remover workspace after reviewing the upload and credit tradeoffs.
Validate transparency before using the logo
A checkerboard in one editor is not enough. The final GIMP output was placed, without retouching, over four surfaces:
- Checkerboard: confirms that the outside rectangle is transparent and exposes isolated opaque islands.
- Light: reveals dark clipping and helps compare the output with the original white-background appearance.
- Dark: exposes pale halos and partly transparent edge pixels.
- Brand purple: checks the logo in a realistic colored layout and makes missing white artwork obvious.
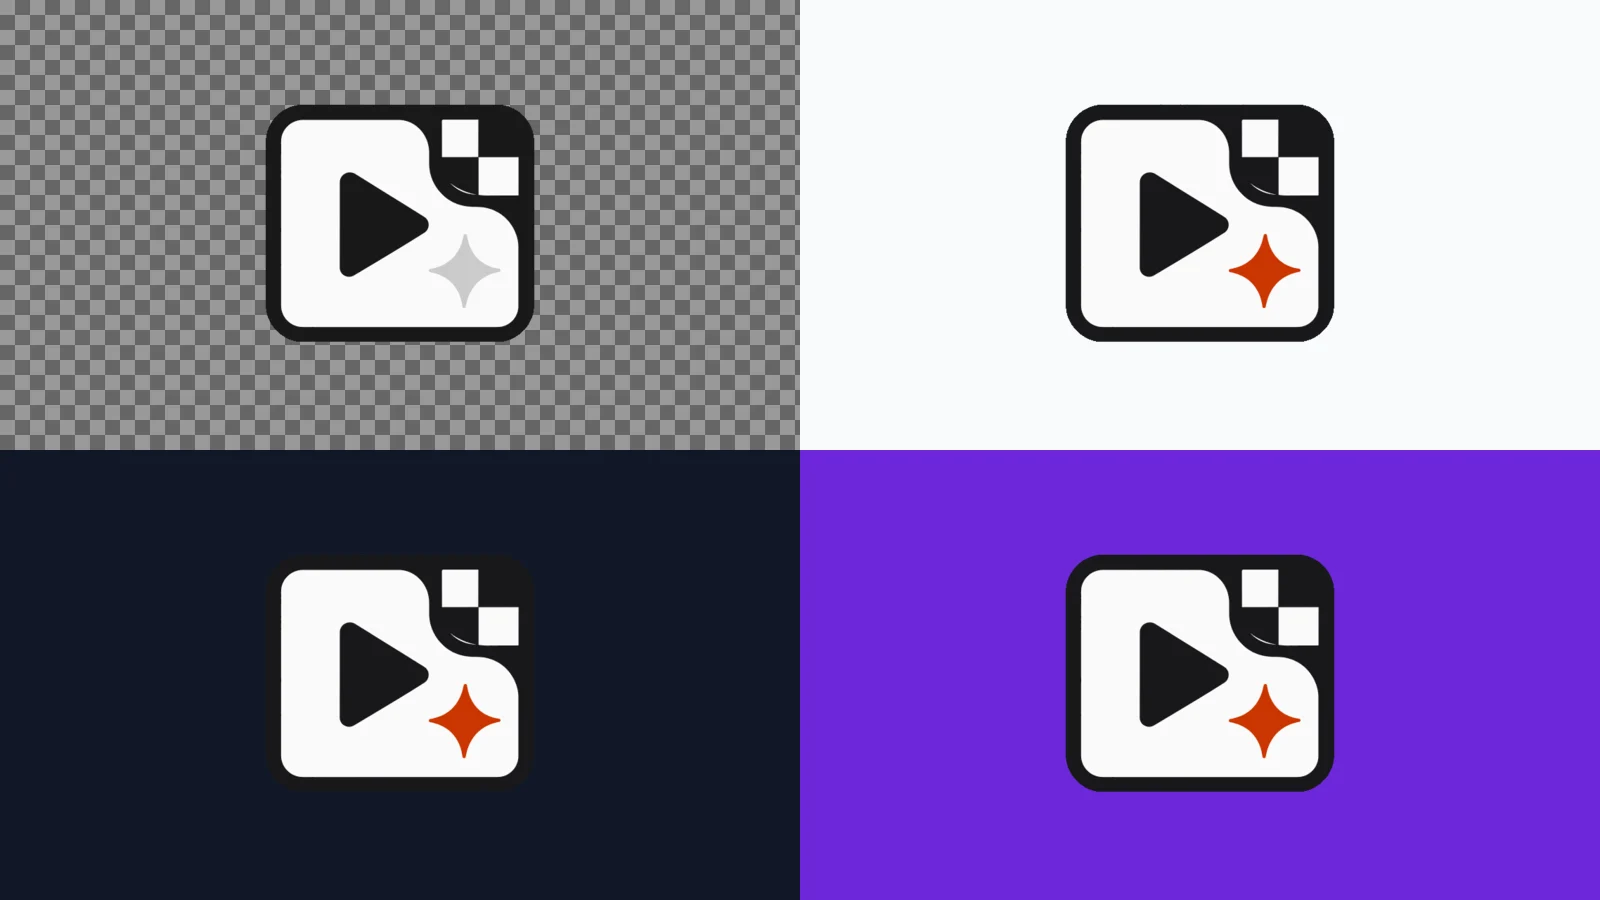
Also compare the exported width and height with the input. Reopen the downloaded file instead of trusting only the live preview, zoom into the outer edge and internal openings, and check it again at the size where it will be used.
If the PNG still looks white
A transparent PNG can appear white because an image viewer uses a white canvas. Place the file over a dark shape in a design app or reopen it in an editor that displays checkerboard. If the white area moves with the logo and stays visible over every background, it is probably still opaque.
If the exported file ends in .jpg or .jpeg, export again. GIMP's JPEG export documentation states that JPEG does not support transparency. PNG can use an alpha-capable pixel format, documented in the GIMP PNG export reference. Keep SVG when you have a trustworthy editable vector source; use PNG when the destination needs a raster transparent logo.
The job is complete only when the outer box is transparent, intended white artwork remains, edges hold up on contrasting colors, dimensions are correct, and the exported file still contains transparency after reopening.